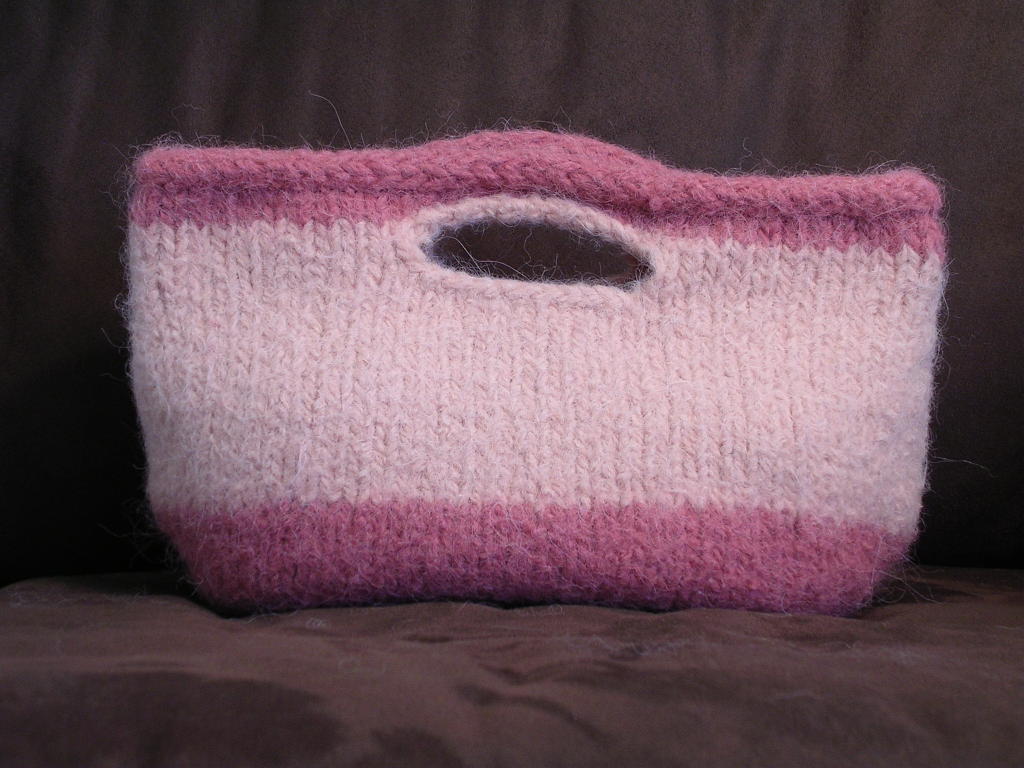
Buttonhole bag
 I got sidetracked by a quickie...
Pattern: Buttonhole bag by MasonDixon knitting
Materials: Cascade Pastaza (50% llama, 50% wool, 132 yards) 1 skein each of colors 1001 and 1006. Size 15 Denise interchangeables.
Gauge: 10 sts and 14 rows = 4x4" before felting
Finished size: 13.5" wide, 10" tall when laid flat
Started: September 2, 2005
Frogged: September 3, 2005
Finished: September 4, 2005
Notes:
Pattern followed as written with the following clarifications and modifications. I did indeed hold two strands together throughout as the pattern stated, but I don't think Pastaza is nearly as bulky as Lamb's Pride Bulky. Started with contrast color and continued with it until the last increase row. Added two rows of main color at the widest part and inserted one row between decrease rows for a less oval shape. Changed back to contrast color at 2nd row of knitting straight after handle shaping and added one row for handles before bind off row. Instead of binding off, I cast on 3 stitches, and added an applied I-cord around the top. I had nearly identical amounts of yarn left over, which amounted to almost nothing. Yay for yarn efficiency!
Discussion:
My first felting experience! I was very excited to try my hand at felting since Ryan did the Man Knitting contest. And after buying all that yarn... well I had to put down the Christmas presents and start something new. It was really weird not working with sock weight yarn all of the sudden.
Anyway, after reading the posts about other people's buttonhole bags, I was determined not to use 3 skeins of bulky weight yarn as the original pattern had suggested. So gosh darn it if I could make the bag as big as possible without opening up my 3rd skein.
Here is a lesson in thinking before you alter a pattern. Thinking can often prevent unnecessary frogging. Who'd a thought??? Anyway, Ryan points out to me afterwards that it's silly to think that if you have the same yardage as is prescribed in the original pattern and the designer says, yes, you could do this with just two balls, as long as you have a little extra in another color leftover from another project, it's probably a bad idea to add 4 extra stitches in width from the beginning given the gauge of 2.5 sts/in. It just didn't occur to me. So I went my merry way and said, oh, as long as I'm going to be increasing the overall width, I think I'll increase the height as well to preserve the overall proportions of the bag. I won't take the designer's advice on where to insert extra rows for heigh, but rather I'll insert them in the middle of the increases. It'll all work out in the end. Well, I ran out of the peach color somewhere in the middle of the bag, and the bag ended up looking like a giant V.
So you'd think that as long as I was frogging due to shortage of yarn, I'd rethink the alteration of width. Yeah. Not so much. Being the stubbon one that I am and not wanting to pick up stitches again, I frogged back to the base and started over with the increase rounds. I STILL ran out of yarn before the handles. Yeah. Big surprise. So I frogged for a second time, this time, all the way out. I made my modifications as I mentioned above, and thankfully, didn't have to frog a third time.
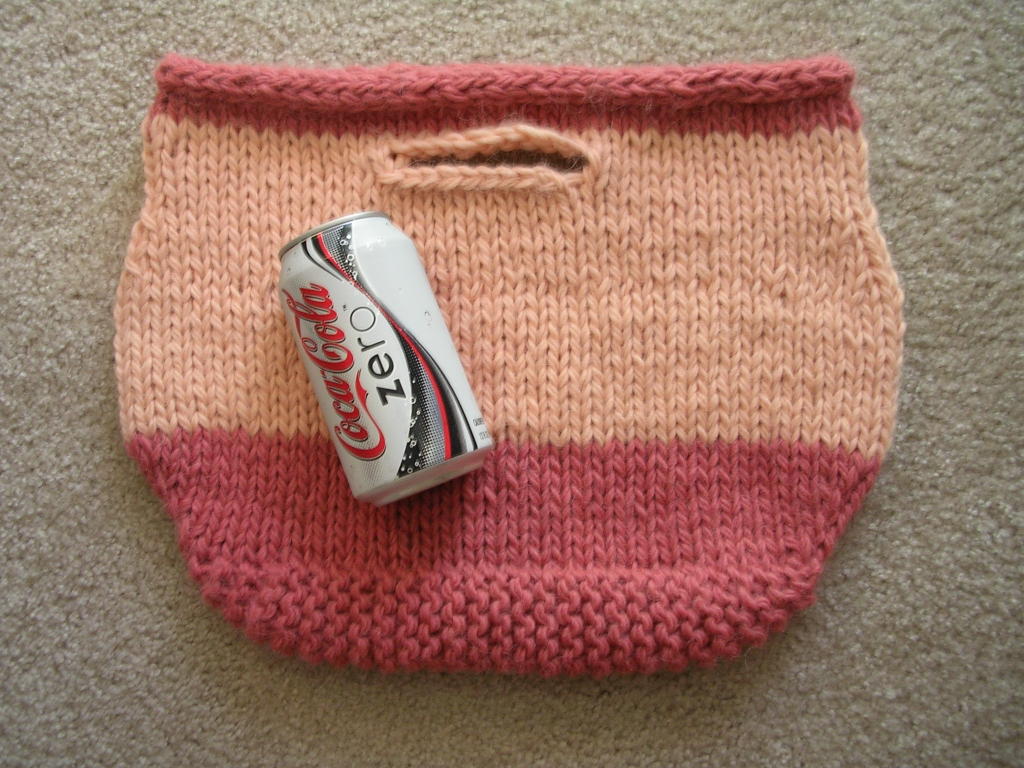 Oh the magic of felting. This thing really does have the appearance of a yeti! There was fur all over the place, as you may be able to tell if you look at the couch in the big picture above. And felting by hand is a massive chore that I do not wish on anyone. Still, it came out even, and in the end did shrink more vertically than horizontally. Pre-felted measurements were 15" wide and 11.5" tall.
All in all, I recommend the Buttonhole bag as a first bag and felting project. It's a fast knit (assuming you don't make random changes without thinking) and none of the techniques used are particularly difficult. I may want to add something to the bottom to give it a bit more support so the bottom doesn't sag when you pick it up, and I may add a flap with a snap to close off the top without pulling the sides themselves in and ruining the cute shape.
Previous posts about this project:
Soowee! on 9/2/2005
![]()